Showing posts with label Tips trik & cara. Show all posts

Tuesday, November 12, 2019

Cara Mudah Membuat Privacy Policy Untuk Blog

Cara membuat sebuah kebijakan privacy policy untuk blog dengan mudah melalui cara online .Membuat sebuah laman privacy policy terkait dengan alasan seperti sebuah surat atau sertifikat blog ,Harus di buatkan jika mempunyai sebuah website blog yang akan di daftarkan pada sebuah jaringan afilasi ads marketing seperti yang paling booming di saat ini ialah google adsense.Jika kamu ingin mempunyai blog dengan di lengkapi iklan google adsense yang tayang,Maka sebelumnya dan jauh hari sebelum mendaftar kamu harus membuatkan blogmu sebuah sertifikat berupa kebijakan keamanan privacy policy,Standart komunitas, dan hal lainnya.Ini bisa di picu oleh peraturan perundangan untuk seorang member publisher pada ads ternama dan penuh tanggung jawab besar.

Privacy policy bisa saja menjelaskan bagaimana latar belakang mengenai blog tersebut di dirikan,dan bisa saja menjelaskan suatu kepastian pada setiap pengguna jika mengunjungi atau membuka situs blog tersebut.Kamu bisa saja mengetik dan membuatnya secara manual di halaman statis lampiran bloggermu,Atau jika tidak mau repo,Kamu juga bisa menggunakan jasa online pembuatan privacy policy secara gratis ,Yang cocok untuk blog adsense.

Ingin tahu caranya? Silahkan saja langsung simak langkah di bawah ini.
Yang pertama,Silahkan kunjungi situs tempat pembuatan privacy policy gratis secara onliennya di halaman berikut ini.
http://www.privacypolicyonline.com
 Pada halaman privacy online kamu akan menemukan sebuah laman seperti gambar di samping dan jangan lupa untuk  di isikan dengan Nama blogmu.Url atau alamat web blogmu,Serta memasukan alamat email yang kamu gunakan,Jika sudah ? Jangan lupa untuk mengklik atau memilih encrypt with javascript seperti yang terlihat pada gambar di atas,Dan langkah selanjutnya ialah seperti gambar di bawah berikut.

Gambar di samping ialah gambar lanjutan di halaman utama privacy policy online.Maka yang perlu disikan ialah yang seperti gambar di samping ,di bagian cookies maka pilih saja yes Dan untuk di bagian advertiser on your site,Pilih atau centang semuanya.Mulai dari google adsense,Amazone,adbrite,tradedoubler,kontera,clickbank,Chitika,yahoo,azgoogle,widgetbucks dan yang lainnya.Jika sudah ? Maka langsung saja untuk mengklik generate Html untuk menghasilkan sebuah kode html yang akan di pasangkan pada halaman statis atau halaman lampiran bloggermu.Jika sudah muncul kode nya,Copy saja semuanya dan pastekan di halaman blogger dengan cara sebagai berikut:
  • Buka dasbhord blogger
  • Pilih halaman
  • Klik new halaman 
  • Didalam penulisan,Pilih mode html dan pastekan kode yang di copy tersebut.
  • Buatkan judul dengan judul "Privacy policy"
  • Terakhir klik simpan / publikasikan.
nah itulah cara membuat privacy policy secara onlinte untuk blog blogger dan wordpress,Yang tentunya cocok untuk membuat akun di google adsense dengan mendaftarkan blog menggunakan domain TLD.Cukup mudah kan? selamat mencoba dan salam sukses.

Friday, November 8, 2019

Cara Paling Mudah Memasang Icon Di Blog

Cara membuat dan memasang font Icon yang berbentuk ikon kecil symbol by font awesome di blog pada bagian navigasi yang sesuai dengan nama kategori atau label blog,Misalnya label Blogger,dan ada icon kecil seperti gambar icon "B" kecil dan berwarna hitam.Dan itulah yang dinamakan icon font awesome.Bagaimana cara membuat serta memasangnya di blog ,Mungkin ini akan menjadi pertanyaan yang sangat banyak di pertanyakan oleh para blogger pemula.Nah kebetulan pada kesempatan kali ini blog teknob akan menyajikan cara yang bisa kamu gunakan untuk memasang icon symbol di blog dengan menggunakan bantuan dari font aweseome.Caranya sangat mudah di lakukan ,Kamu hanya perlu menyimak cara-cara yang ada di bawah in step by step.Agar bisa paham dan ikon bisa muncul di menu navigasi blog atau bagian footer blog.Dengan contoh item yang bisa di tempelkan icon ialah Item Home,Kategori,Sitemap,Contact,Privacy,Disclaimer dan pernak-pernik blog lainnya.

Apakah kamu ingin melihat hasilnya ? Kamu bisa melihat bagian navigasi blog teknob ini,Maka kamu akan melihat sebuah ikon android ,tag penutup,Ikon windows dan ikon mozila firefox.Nah itulah yang akan di tutorialkan mengenai cara pembuatannya di blog blogspot.com pada kesempatan kali ini.

Langsung saja ya geng,Kita akan menuju cara pembuatannya ,ini cukup mudah dan simpel,Namun harus penuh dengan ketelitian.Dan inilah cara-caranya:

1.Pertama tama kamu harus menempatkan dan menginstall dukungan font icon kode di bawah ini tepat di bawah tag <head> template blogmu,kode ini merupakan sebuah kode pembentuk icon symbol khusus font awesome.

<link href='//netdna.bootstrapcdn.com/font-awesome/4.7.0/css/font-awesome.css' rel='stylesheet'/>

2.Terus yang keduanya ialah ,Menggunakan kode html untuk membangun font awesomnya dengan contoh html seperti di bawah ini.

<i class='fa fa-nama icon yang kalian pilih'/>

3.Kode pembentuk icon di atas kamu gunakan dan tempelkan di dalam template atau bagian navigasi yang ingin di buat menjadi ber icon seperti contoh item navigasi seperti di bawah ini.Sebelum dan sesudah.

sebelum di tambahkan html icon font awesome
<a href='#' title='About'>About</a>
<a href='#' title='Contact'>Contact</a>
<a href='#' title='Disclaimer'>Disclaimer</a>
<a href='#' title='Privacy Policy'>Privacy Policy</a>
<a href='#' title='Sitemap'>Sitemap</a>

sesudah di tambahkan kode html icon
<a href='#' title='About'><i class='fa fa-nama icon yang kalian pilih'/>About</a>
<a href='#' title='Contact'><i class='fa fa-nama icon yang kalian pilih'/>Contact</a>
<a href='#' title='Disclaimer'><i class='fa fa-nama icon yang kalian pilih'/>Disclaimer</a>
<a href='#' title='Privacy Policy'><i class='fa fa-nama icon yang kalian pilih'/>Privacy Policy</a>
<a href='#' title='Sitemap'><i class='fa fa-nama icon yang kalian pilih'/>Sitemap</a>

4.untuk mengetahui nama fa fa iconnya,Kamu perlu mencari tahunya dengan mengunjungi situs font awesome dengan menggunakan Url di bawah ini.

 https://fontawesome.com/v4.7.0/icons/

5.Jika sudah mengunjungi situsnya,Pilih saja gambar ikon yang akan di gunakan,Dan jangan lupa untuk menyimpan atau menggunakan nama ikonnya,Hal ini icon agar bisa valid dan tampil di di blog mu.Dan di bawah ini adalah nama dari font awesome yang bisa di gunakan.


Nah itulah cara paling mudah yang dapat di gunakan untuk menambahkan icon ke dalam item navigasi blog,Kamu juga bisa mengkereasikannya lebih agar tampilan blogmu terlihat sangat professioanl walaupun masih newbi dan pemula.Selamat mencoba dan berkereasi.

Saturday, October 12, 2019

Tips For Blogs to Rank on The Search Engine Results Page


Easy Tips blog gets ranked on Search Engine Results Pages, For those of you who often play blogs, surely you will recognize this, which is search engine search results and the first page of search engines. This has become a place for competitors to compete with its flagship blog.

the top page in search engine search results like google com.

To do it all on a blog, you need to do a lot of tips that can make you compete on the first page of search engine search. If you want to try these easy tips, chances are your website / blog can be the first page as you wish.

Blog tips can be the first page in search engine search engine results.

for that, you need a guide so that your blog can be the first page on a search engine like this:

1. Create content that is scientific work.

Making the content of a scientific work can improve the ranking of blogs in the eyes of search engines, because scientific works made from scratch do not have in common with other blog competitors.
it is understood, even though there is a lack of additional images which are usually used as a reference for writing papers.

2. Can target keywords that if unique and different from other blogs.

You can also use the method of applying keywords in the contents of your blog article, the keywords you input must match the contents of your blog content, which does not reduce or exit the content of the discussion on the blog.

Quite easy to create keywords for SERP blog, you can make it with additional applications such as the use of tags, marked in bold and italics. this is a short way to indicate that it is categorizing it as a keyword. Relevant key words you can suppose if interested in many people in the content of your blog content.

3. utilize social media as a bookmark

You can also make your blog become a SERP by relying on media bookmarking. Because this can help your blog appear on search pages, for example by using social bookmark facebook.

Just try to make a page on Facebook and share your blog link. share the Facebook leat can appear on Google searches, and you don't need to worry because if the link is on Facebook it will still be directed to your blog too. It's easy enough to keep the SERP blog.


That's the tips for your blog to be on the first page of search engine search, by applying this guide, maybe your blog's ranking will increase quickly.

The easy way to get blog visitors


A blog is a free knowledge sharing service that is empowered by many builders in this era, not a few in the hemisphere in who have a blog and become an expert blogger, both from processing blogs and utilizing blogs as a profit land that is easy to use.

Only by using the internet and mastering the feasibility method of playing goals on the internet, a true blogger knows what to do, such as finding new ideas in the form of information and new ideas in the form of updates.

ideas that are obtained will be channeled through writing through blogs that are managed with the aim that these ideas can be used and understood by the general public or all internet active users. On the other hand in the form of this update is often done by several people in playing This web-based application, such as updating the appearance of blogs such as templates with the latest launch from Google, AMP.

But did you know? Blogs must also have complementary examples, such as readers and visitors.

The reader of this blog is not easy to get, with the aim of your blog can be recognized by many people and read one by one the contents of the ideas that you pour in the blog.

What does it mean?
The point is that you have to be able to provide all the information that will be addressed to everyone!

Why ?
Because this has happened without realizing it, you must be able to meet the information needs of the reader of the blog that you manage.

So what can I do?
If you like playing blogs, and you want your blog to visit and read your blog posts a lot! then the easy step you take is to find out your general needs by looking at the search results on Google.

Well, this blog will discuss how to find out what things are being searched for on Google and good for blogs in meeting blog visitors who benefit you.

You can do it all by using a product from Google called Google Trend. Google Trend can make it possible to provide a small picture for you and your blog in finding articles that are popular on the internet. on Google search.

By typing keywords that are popular in various countries, for example with the keyword "the most recent Windows", by using this kind of thing, you are given easy access to search for topics about the latest windows, then your steps on the blog that you can do is make a post about the latest windows which will later be the basis for bringing lots of blog visitors quickly to your blog.

Google trend is very possible for you to get a good topic for your blog, this is one way you can do to be able to have a lot of blog visitors, which can make a profit for you from your own blog.

There are still so many ways you can do to get blog visitors that quickly increase the presence of blogs in search engine results. For example, by registering your blog on various free web master tools such as Google's web master tools, Yandex and bing web masters.

Instructions and methods of use, you only verify your blog and include a series of xml sitemaps which will be crawled periodically. This way your blog will be indexed quickly in search engines and can make a lot of visitors for your blog.

Quite easy ways you can do, I hope this article is useful for you who are in the process of managing a blog.

Dynadot Cheap Domain Buying Guide and DNS Settings on Blogger


Dynadot Cheap Domain Buying Guide and DNS Settings on Blogger. Creating and owning a blog website requires you to make changes both in terms of appearance and also the name that is used, and of course no other such as a blog URL address that you have.

In another case, the URL of the blog that you have can be changed according to your wishes, by mentioning the domain change. The domain that you will use you can get on various hosting sites on the internet and of course it is not not free to get it.

As is the case with a website builder platform from blogger.com. Which, where Blogger is a free Blog creation service, in addition to that blogger also provides a service to change the name of the blog URL (Domain) that you can do with the steps to make a purchase at a price already in specify it.

if you want to use a domain from blogger (google), usually after you create a blog, you will be presented with an option to buy a domain from google.

But on this occasion, this blog will only review information about purchasing domains on the Dynadot web hosting site and information on how you install the domain you purchased through Custom DNS settings on Dynadot.

If you know the uniqueness of dynadot web hosting sites, you will find a service that you rarely encounter in other web hosting services.

You can find domain prices from dynadot jiga domains like .com at a fairly cheap price, usually will range between five dollars or more, and also, Dynadot supports payments using Skrill Moneybookers, which can be said to be very rare using web hosting Skrill services as a payment tool for users.

How ? Quite interesting to use dynadot as your web blog webhosting service!
If you want to register, follow the short guide below:

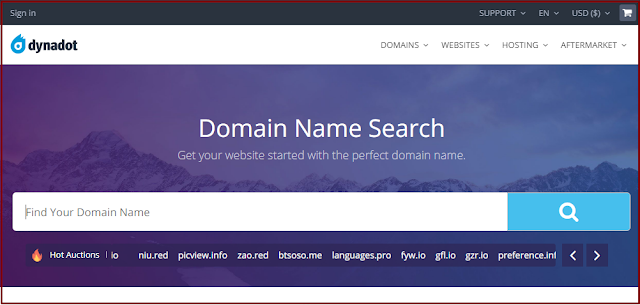
1. Please visit the Dynadot website and find a domain that is suitable for your web blog >> enter the domain name >> Click the search icon.


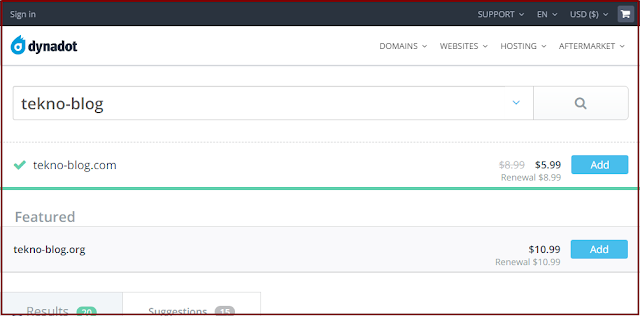
2. if the domain you want already exists, click add and go to the check out process.


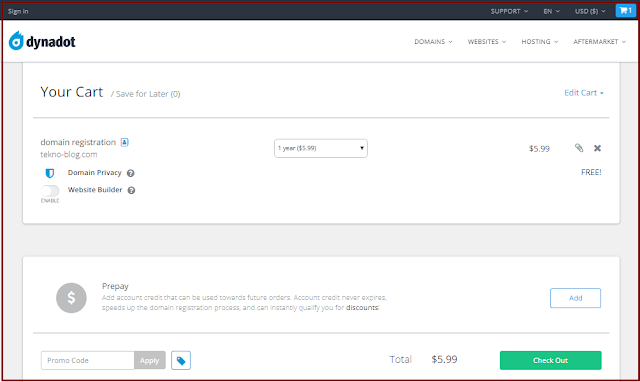
3. on the checkout process, if you only need the domain for the blog, then don't select or activate the website builder mode. Remember: You can also specify the domain period. And if you just click check out.


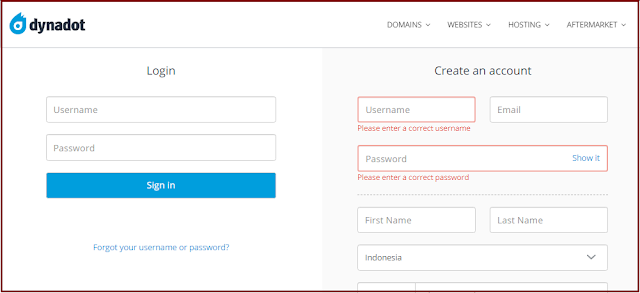
4.In the checkout process, you have just started on Dynadot, then you need to create an account first by entering your complete data such as e-mail address, full name, contact details, password and others, finally click on create account.


5. The next stage if you have successfully created a dynadot account, you will be diverted to the payment method that you need or can use such as: Credit card, Skrill, Paypal, money order / check, Bank wire.
Select the payment method that you use and click submit order.

6.Login to your dynadot account, select the domain you bought earlier, click the point choice and click send payment. You will complete the payment with the payment instrument that you entered when ordering. Until here you have successfully purchased a cheap domain on dynadot.

If you have registered and ordered a domain, then you have to confirm the purchase until it's done. After that you will be given a domain and you must use the domain for your blog, for example your blog on blogger. Incidentally this tutorial is for you to create a blog at blogger.

How to set custom dynadot dns for blogspot (blogger)

Easy, easy, easy, and need patience in this matter. But if you feel that your domain is ready to use on your blogspot, here is how to install a domain dynadot on a blogger blog.

1. Click the paid domain or check and select the action, after that will appear select, just select DNS settings.

2, On the DNS settings page, you must fill in cname, forward in the subdomain and domain record. With a note as below.

Domain record (Required)
Record type = Select Forward
IP Address or Target Host = Enter the IP Host URL / domain name that you purchased for example (https: //www.yourdomain .com)

Subdomain Records (optional)
Subdomain = input in: www
Record Type = select Cname
IP Address or Target Host = enter: ghs.google.com
and save it.

3, If it is successful, go to your blogger by: Open the Blogger dasbhord >> Click settings >> Basic >> Add a third-party url >> Enter the Domain with the form (www.yourdomain .com) >> And click save.

4, Wait for the https mode switching process to succeed.

quite easy how to buy a cheap domain on dynadot and how to install the domain on blogger via DNS.dynadot settings also provide payment methods that support such as paypal, Skrill moneybookers. This is an convenience for you who have a skrill balance.

Friday, October 11, 2019

How to create a blog on blogger


Start sharing your story and your experience by writing an article on blogger, which you can make as a form of hobby in an effort or form of writing something that can be used for the public that is of course everyone who uses the internet.

With the aim of creating a blog through blogger, you also have the opportunity to use all the features available on Google, both in the form of communication networks for issues such as email services, and can also participate in advertisements such as Google Adsense.

Blogger is a free blogging service that is held by large companies, Google.

And until now, do you already have a blog on blogger?

And are you interested in trying services from Google such as managing a blog?

Or do you also want to participate in the form of affiliation offered by Google?

If everything is in your mind, then start with a blog on blogger.

Because this blog post will provide a tutorial for creating a blog on blogger for free.

Well maybe we can start with the methods as below.

How to register in blogger, to create a unique blog

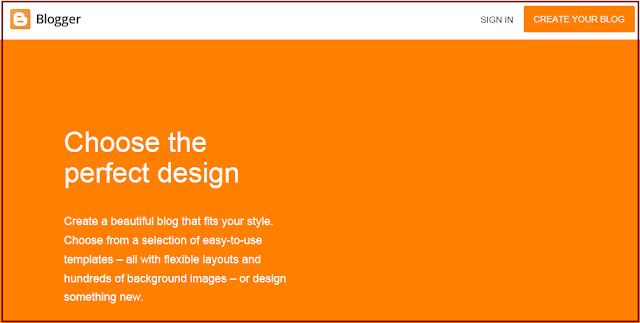
1. The first step is: Prepare an email, this email will be the main thing to create a blog. And specifically email that you can use like an email in Gmail. If you already have a Gmail email >> Visit the Blogger  website and click on create your blog.


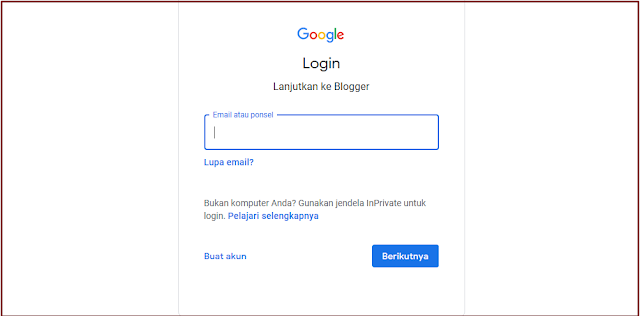
2. On the blogger interface, please log in using the email address you have created in Gmail. >> Enter the email address correctly >> Enter the password correctly and click enter.


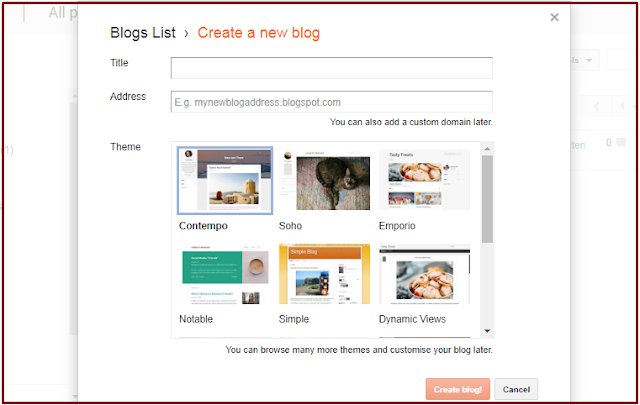
3. If you can enter using the email address that you created, then you will go to the blog creation page on blogger and start filling in the available fields such as: Blog Title >> The exact blog address and definitely use the blogspot.com subdomain >> Select blog themes/template that you think are good and responsive >> And finally click on create a blog.


4. Successfully, you already have a unique and beautiful blog, which you can start managing from themes, SEO optimization, adding widgets, buying a TLD domain, and also filling in important pages such as contact about me privacy sitemap and disclaimer.

You can see your blog by clicking below the name of your blog.

So what else should you do?
It's easy for you to do is to start filling the blog with good content by writing from the scientific work method by completing it like pictures, information and so on.

Another thing you can do is change the default theme of your blog that you have created or you can also download free themes and paid themes.

You can learn more by searching for a solution on Google to complete your blog.

interesting information is, you can now join or participate in ad networks such as adsense that can be utilized well, but must have certain basics that you need to learn.

Enough discussion about creating a blog on blogger for free, Complete your blog with other interesting things.

If you find this post useful, don't forget to share it on your social media. !!

Thursday, October 10, 2019

how to create a privacy policy blog


a way to create a privacy policy blog very easily, without the need to type it yourself and make it from scratch, because there is already available by using the privacy policy generator online.

This is very good, of course, because things like this can already be relied on to join the afylation of ads such as Google Adsense, the most popular at this time for bloggers.

If you are interested in creating a privacy policy for your blog using the online privacy generator method, this blog will share ways to do it.

1. The first way to create a privacy policy using online privacy services is, you can visit the privacypolicyonline web site.


2. On the privacy policy page you will fill in data such as >> your site title >> your site URL >> Contact link >> email address.

3. And then all you have to do is click and check encrypt email, and for advertisers, check everything like Google Adsense, Amazone, Commission Junction and others.

4, if you have then the final step is to click generate policy.

5. The results of the generate policy will be displayed in HTML form, copy all the code, and paste it in your blogger by: Enter blogger dashbord >> Select page >> Click new page >> Select HTML mode >> paste the generator policy code here >> Make a title with the name "Privacy policy" and click publish

At this point, you can create a free privacy policy online at the privacy policy generator website. If you like this article, don't forget to click the share button on the side and at the bottom, hopefully you like this article.

You can also read other interesting posts on this blog such as "How to make a Blog on Blogger" and there is also "How to make a disclaimer for your blog on Blogger" that you can try for a blog that you have or you are still a reader of this blog.

How to make a Disclaimer For Bloggers


How to create a content about disclaimer for blogs on blogger.

Make a blog or website a disclaimer, indicating the blog has a vision and mission.

For example, explaining how the blog gets profit via the internet, by utilizing an outstanding affiliation network.

So if you can say, your blog or website must be made a content about your blog disclaimer.

However, if you are confused to fill in the cash and writing as what you have to write, on this blog will provide a tutorial for you, who want to create a disclaimer content by using the privacy policy generator online.

Do you really want to make a context disclaimer for your blog?

If so, this is the way you can try to do it.
This is very easy, of course, and can also support like Google Adsense

The following is:
How to make a disclaimer is easy and free for bloggers.

1.The first thing you can do is visit the PrivacyPolicyonline website.


2..If so, on the privacy policy page like the image below, just click the disclaimer generator directly, then you will go to the filling page like Entering your blog name, blog url address, email address, and select encrypt with email, if you have clicked immediately generates a disclaimer


3.If you have clicked on the disclaimer generator, then a content will appear in the form of html, you copy the text. This will be attached to a new page on bloggers.


4.If you have copied the text in the page box, then the next step is to install it in blogger by: >> Open Blogger >> Click on the page >> Create a new page >> Select In HTML Mode >> Make a Disclaimer Title >> Paste the text was copied earlier >> And please publish.

until this stage you have been able to make your blog a disclaimer, Now it is only a way that the disclaimer can link to the initial appearance of your blogger blog.

by: After completing the disclaimer, you open blogger >> Page >> and click view page >> Copy the disclaimer page link >> And finally please set the place you put it.

It's easy to make a disclaimer for blogger blogs, by using a free online disclaimer generator and can also be used on Google Adsense.